
How to Make a Stunning Floral Cornucopia for Your Thanksgiving Table
(Including My Secret Weapon: Glad® Press’n Seal® for Wrapping Floral Foam!)
If you’re looking for an easy, show-stopping Thanksgiving centerpiece, a floral cornucopia is the perfect blend of traditional harvest décor and fresh, modern style. Even better? You don’t need to be a professional florist to make one. With a few simple materials—and my secret weapon, Glad Press’n Seal—you can build a gorgeous arrangement that instantly elevates your holiday table.
Below, I’ll walk you through how to wrap floral foam so it stays contained, hydrated, and mess-free, how to secure it inside your cornucopia, and how to use a premade floral bunch to create a lush, full centerpiece in under 30 minutes.
Why a Floral Cornucopia Works for Thanksgiving
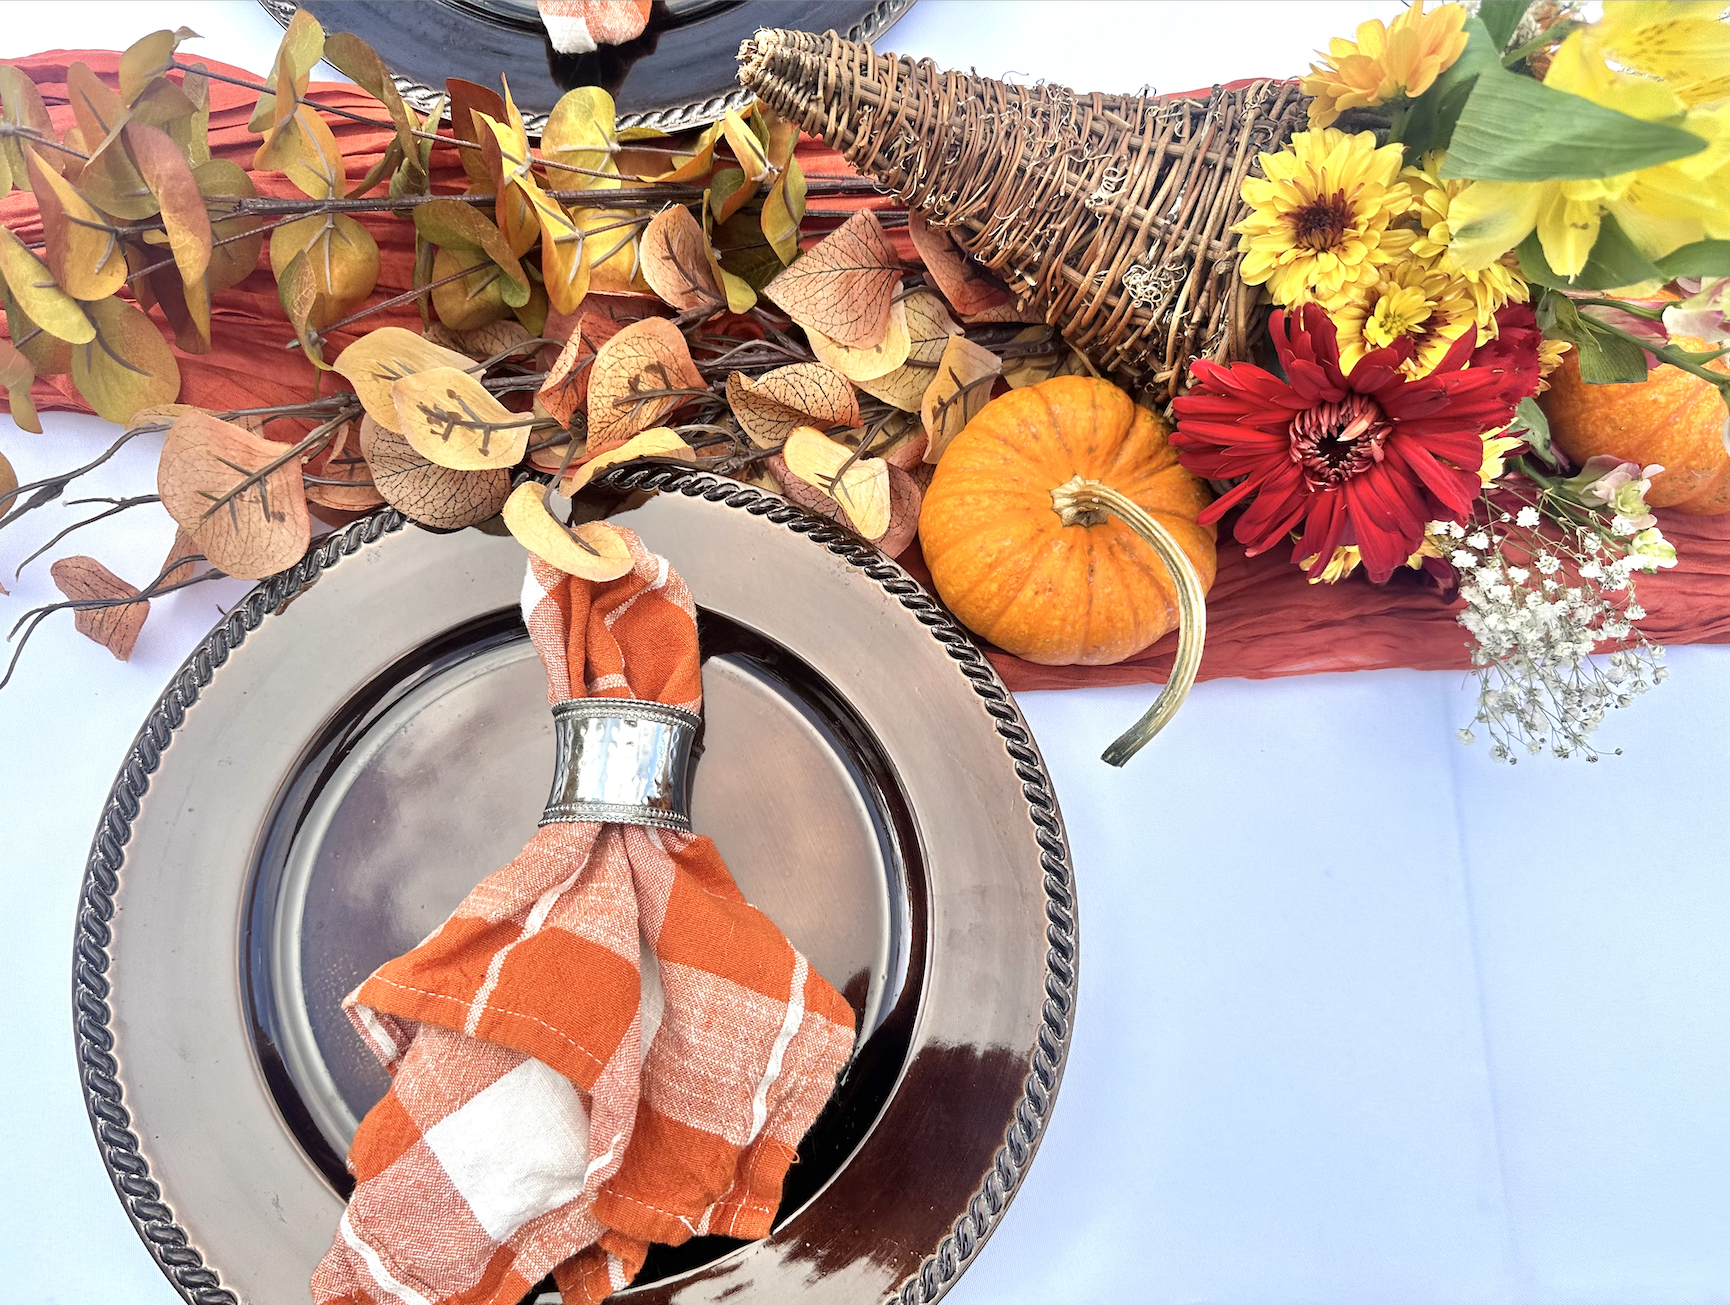
A cornucopia, or “horn of plenty,” symbolizes abundance, gratitude, and fall harvest—basically everything Thanksgiving is about. Adding fresh flowers brings life, fragrance, and vibrant color to your tablescape, making your entire dining room feel festive and intentional.
What You’ll Need
A woven cornucopia basket
Floral foam (wet foam for fresh flowers)
Glad Press’n Seal (my go-to hack!)
A premade fall floral bunch or two
Extra greenery or filler (optional but beautiful)
Pruners or scissors
A small bowl or sink for soaking foam
Step 1: Soak Your Floral Foam
Start by cutting a piece of floral foam that fits comfortably inside the widest part of your cornucopia. Place the foam in a bowl of water and let it sink naturally—this ensures it absorbs water fully and evenly. Avoid forcing it down; forced dunking can create dry pockets inside the foam.
Step 2: Wrap the Foam in Glad Press’n Seal
This is the trick that changes everything.
Glad Press’n Seal keeps the foam from breaking apart, stops water from leaking into the basket, and lets you work much cleaner. Wrap the wet foam completely, then punch small holes where your stems will be inserted. The wrap holds moisture while still allowing the stems to anchor securely.
Why Press’n Seal Works So Well:
It clings tightly to the foam
It prevents your cornucopia basket from getting soggy
It allows you to remove and refresh the arrangement easily
Once wrapped, your foam will feel sturdy and easy to handle—no crumbling, no mess.
Step 3: Secure the Floral Foam Inside the Cornucopia
Slide the wrapped foam into the open end of the cornucopia. If it’s a little loose, you can wedge in a small hand towel or crumpled paper toward the back to stabilize it. You want the foam slightly angled forward so your arrangement can spill out naturally, giving it that iconic “overflowing harvest” look.
Step 4: Add Your Premade Floral Bunch
The easiest way to get a professional look is to start with a premade floral bunch—they’re coordinated, color-balanced, and already include complementary textures.
Cut the stems at an angle and begin inserting them into the foam, spreading the blooms evenly. Let some flowers drape gently toward the opening of the horn for that cascading effect. Place taller stems toward the back and center to add height.
This method saves time and gives you a gorgeous color palette without guesswork.
Display and Enjoy
Place your finished floral cornucopia in the center of your Thanksgiving table. Add candles or small pumpkins on either side to complete the look.
Creating a floral cornucopia is easier than you think—and with a few insider tricks like wrapping your floral foam in Glad Press’n Seal, you’ll get professional results with minimal mess. Using a premade floral bunch means you can enjoy a full, coordinated, holiday-ready centerpiece in just minutes.
It’s the perfect way to bring beauty, abundance, and a little creativity to your Thanksgiving celebration.